Update your Settings
In order to make the Pay iO payment gateway feel more secure for your customers, you should specify your business settings with your Logo and brand colors. You can specify the logoUrl which needs to be be a publically available URL. Meaning it should be accessible without having to login to an account.
The buttonMainColor is used as a the background color of the buttons on the Pay iO payment gateway. It is recommended to use the main brand color of your business.
- Javascript
- cURL
- PHP
fetch('https://secure.payio.co.uk/api/merchant/setMerchantSettings', { headers: { 'X-API-KEY': '123456789abcdef', }, method: 'PUT', body: { logoUrl: 'https://my.publically.available.logo.url', logoText: 'My business Logo', buttonMainColor: '#F0E214', },});curl --request PUT 'https://secure.payio.co.uk/api/merchant/setMerchantSettings' --header 'X-API-KEY: 123456789abcdef' --header "Content-Type: application/json" --data "{ logoUrl: 'https://my.publically.available.logo.url', logoText: 'My business Logo', buttonMainColor: '#F0E214' }"$curl_h = curl_init('https://secure.payio.co.uk/api/merchant/details'); curl_setopt($curl_h, CURLOPT_HTTPHEADER, array( 'X-API-KEY: 123456789abcdef', 'Content-Type: application/json' )); $data = array( logoUrl => 'https://my.publically.available.logo.url', logoText => 'My business Logo', buttonMainColor => '#F0E214') curl_setopt($curl_h, CURLOPT_RETURNTRANSFER, true);curl_setopt($curl_h, CURLOPT_CUSTOMREQUEST, "PUT");curl_setopt($curl_h, CURLOPT_POSTFIELDS,http_build_query($data));$response = curl_exec($curl_h);Plugin Active
Once you have integrated your platform to the API, you need to set your plug-in as active:
fetch('https://secure.payio.co.uk/api/merchant/setMerchantSettings', {
  headers: {
    'X-API-KEY': '123456789abcdef',
  },
  method: 'PUT',
  body: {
    pluginActive: true,
  },
});
Sandbox Mode
By default, your business is set in sandbox mode. This means that Pay iO won't be using real payments during the checkout process. The purpose is that you can take the time to test and make sure everything is working correctly before opening Pay iO to your customer to take real payments.
Once you are confident that the integrations working correctly, set your account to not be sandboxed anymore:
fetch('https://secure.payio.co.uk/api/merchant/setMerchantSettings', {
  headers: {
    'X-API-KEY': '123456789abcdef',
  },
  method: 'PUT',
  body: {
    sandboxed: false,
  },
});
Integrate Payment button
We recommend using the buttons bellow for sending your customer to the Pay iO payment gateway.
Checkout
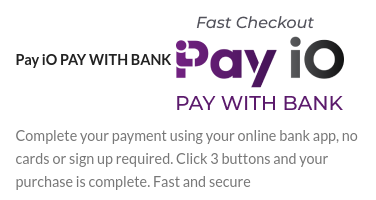
Add Pay iO to the list of available payment methods on your checkout page.
Image:

HTML:
<li class="payment_method">
  <input
    id="payment_method_payio_gateway"
    type="radio"
    class="input-radio"
    name="payment_method"
    value="payio_gateway"
    checked="checked"
    data-order_button_text="Pay with Pay iO"
    style="display: none;"
  />

  <label for="payment_method_payio_gateway">
    Pay iO PAY WITH BANK
    <img
      src="https://demo.payio.co.uk/wp-content/plugins/pay-io-payment-gateway/assets/images/payio-fast-checkout.png"
      alt="Pay iO PAY WITH BANK"
    />
  </label>
  <div class="payment_box payment_method_payio_gateway">
    <p>
      Complete your payment using your online bank app, no cards or sign up required. Click 3
      buttons and your purchase is complete. Fast and secure
    </p>
  </div>
</li>
CSS: Can be changed to your preference to fit best with your platform
li.payment_method {
  list-style: none;
}